

The specification: what the State Department actually says
Source: US Department of State, travel.state.gov: *"Use a plain white or off-white background free of shadows, textures, or objects."*
| Background | Status | Notes |
|---|---|---|
| White or off-white | Accepted | The explicit specification. Pure white (#ffffff) and off-white to approximately #f0f0f0 are both within range. |
| Very light cream | Accepted | Within the "off-white" definition if it photographs close to white. The test is how it appears in the photo, not the paint color on the can. |
| Medium cream or beige | Rejected | Photographs as noticeably yellow or tan. Outside the white-to-off-white range. |
| Light grey | Rejected | Not white or off-white. Frequently caused by white walls lit incorrectly. |
| Light blue or any color | Rejected | The US standard is white/off-white only. Some other countries accept grey or blue. The US does not. |
| White with shadow | Rejected | A shadow on a white background creates grey areas that fail the uniformity check regardless of the underlying wall color. |
| White with texture | Rejected | Textured walls cast micro-shadows that make the background appear grey or uneven in photographs. |
| White with objects | Rejected | Furniture, doors, windows, plants, or any visible object in the background causes rejection. |
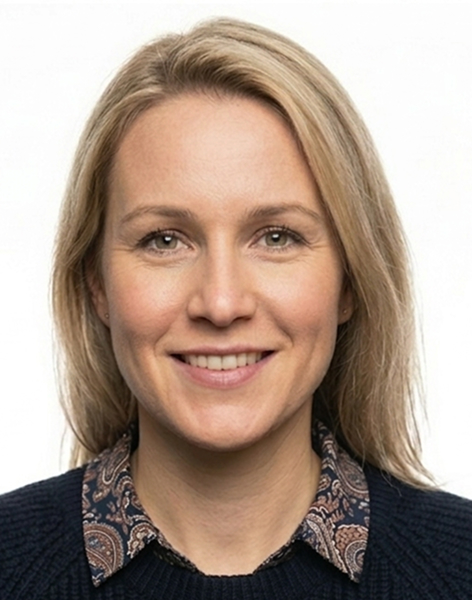
Plain white background applied automatically.
Create your compliant US passport photo →Why your background looks grey when the wall is white
This is the most common confusion in home passport photography. You have a white wall. The photo shows a grey background. Three specific causes produce this result, each with a different fix.
Cause 1: Shadow from standing too close to the wall
When you stand close to the wall, your body blocks light from reaching the wall surface behind you. Your head and shoulders cast a shadow onto the background. Even at two feet from the wall, this shadow is often visible as a darker halo behind the head. At one foot, it is almost certain.
Fix: stand at least three feet from the wall, ideally four to five feet. At this distance your shadow falls below the frame.
Cause 2: Overexposure of the face underexposes the background
When the primary light source is bright and directed at your face, the camera automatically adjusts its exposure to your face. The background, receiving less light, is then underexposed relative to the metered face exposure and appears darker in the photo than it looks to the eye. This is especially common with a single bright window as the only light source.
Fix: add a second diffused light source, use an overcast day where light is even throughout the room, or move the background closer to the light source.
Cause 3: The wall is off-white, not white
Most residential walls are not painted pure white. Common interior paint finishes described as "white" are actually eggshell white, antique white, linen white, or similar off-white tones that are visually similar to white in person but photograph as noticeably grey or cream. This is particularly common in living rooms, bedrooms, and hallways where warm-white paint is standard.
Fix: use the bathroom (typically painted flat white), use white poster board taped to any wall, or use an ironed white sheet.
The textured wall problem
Smooth walls are required in practice, even though the State Department rule says only "no textures" without defining what constitutes a texture. Common residential wall textures that cause background failures:
Orange peel texture: The most common residential texture in the US. The surface has a dimpled, skin-like appearance. Under standard room lighting, these dimples cast tiny shadows that appear in the photo as a grey, grainy, or uneven background.
Knockdown texture: Irregular flat patches of compound applied over the base coat. Creates a mottled, slightly uneven surface that photographs as inconsistent background colour.
Popcorn or acoustic ceiling texture: If the ceiling is visible in the background (from a low camera angle), popcorn texture causes immediate rejection.
Heavy brush marks or roller texture in paint: Even on nominally smooth walls, heavy paint application can leave a visible texture under raking or overhead light.
The fix for all textured walls: tape a large piece of smooth white poster board to the wall behind you (at least 24 x 30 inches to fill the background area visible in the frame), or hang a plain white bedsheet and iron it completely flat. Even small wrinkles in the sheet create visible shadows. Stretch the sheet taut and secure it at multiple points.
Shadows: the most common rejection cause
The State Department primary source: *"The photo includes shadows on your face and the background. Make sure your head and shoulders are centered in the photo. Position yourself several feet away from a white background or wall."*
Two distinct types of shadow cause passport photo rejections — they require different fixes.
Background shadows
Caused by standing too close to the wall. Your body blocks the ambient light that would otherwise fall evenly on the wall surface behind you. At close distances, this shadow appears as a darker region behind the head and shoulders — sometimes a clear shadow outline, sometimes a subtle gradation. Both cause rejection.
Fix: stand at least three feet from the wall. At this distance, the shadow falls below the frame. If the shadow is still visible, increase the distance or change the camera height.
Facial shadows
Caused by overhead lighting, directional side lighting, or flash. Ceiling lights produce shadows under the nose, chin, and brow ridge. Side lighting produces shadows across one side of the face. Flash produces a hard shadow directly behind the head on the wall, even at a distance.
Fix: face a large window with natural daylight. Overcast days produce the most even light because the entire sky acts as a diffuse light source. Turn off overhead ceiling lights. Never use flash.
| Shadow type | Cause | Fix |
|---|---|---|
| Behind-head shadow (dark halo) | Standing too close to wall | Stand 3–5 feet from background |
| Nose/chin shadow on face | Overhead ceiling light | Face a window; turn off overhead lights |
| Hard shadow behind head | Camera flash | Never use flash; use natural window light |
| Side-face shadow | Directional side light only | Add a second light source or use window light from front |
| Gradient grey background | Face overexposed vs background underexposed | Even the light: overcast day or two balanced sources |
Home setup: building a compliant background
Best-case scenario: white smooth wall
A flat, smooth white interior wall with no texture is the simplest setup. Stand at least three to four feet from it. Face a window with natural light. Turn off overhead lights. Shoot with the rear camera. This produces a compliant background for most people in most rooms.
No white wall: white poster board
Tape a large sheet of smooth white poster board to any wall. It should be at least 24 x 30 inches to fill the area visible in the frame behind your head and shoulders. Foam board works well and stays flat. Use multiple pieces side by side if one is not wide enough.
Using a white bedsheet
A plain white bedsheet works, but wrinkles cause rejection. Iron the sheet completely flat before hanging. Tape or pin it taut at multiple points to eliminate all folds. A wrinkled sheet produces visible shadows that make the background appear grey or uneven even under good lighting.
What clothing to avoid
Wear a color with clear contrast against the white or off-white background. White, cream, and very pale colors create an indistinct silhouette where the automated checker struggles to identify the boundary between you and the background. Navy blue, dark green, burgundy, black, and other medium-to-dark colors photograph clearly against white.
Checking before you shoot
Before taking the final photos, take a test shot and zoom in to the background area at 100% on your phone screen. Check for: visible texture, shadow halos behind the head, colour cast (grey, cream, or yellow tints), and any objects in the background. Fix any issues before taking the final shots.
Hex color codes for digital background verification
If you are using a photo editing tool or background removal service and want to verify the background color numerically, these hex codes define the acceptable range:
| Hex code | Description | Status | Notes |
|---|---|---|---|
| #ffffff | Pure white | Accepted | Optimal target for all US passport and USCIS applications. |
| #f8f8f8 | Near-white | Accepted | Indistinguishable from white in photo prints. |
| #f0f0f0 | Off-white (light) | Accepted | Upper edge of comfortable off-white range. |
| #e8e8e8 | Off-white (medium) | Borderline | Visible as off-white. May pass, likely to be flagged. |
| #d0d0d0 | Light grey | Rejected | Clearly grey. Will fail background uniformity check. |
| #f5f0e8 | Warm off-white / cream | Borderline | Yellow-tinted. May flag as coloured background. |
| #e8e0d0 | Medium cream / beige | Rejected | Outside the white-to-off-white range. |
How to use these codes: open the photo in any image editing app with a colour picker. Sample the background area well away from the edges of the hair. Check the hex code of the sampled colour against the table. If the background reads between #ffffff and approximately #f0f0f0, it is within the acceptable range. Anything with a significant grey, yellow, or coloured component is outside the range.
AI and digital background replacement: what is permitted and what is not
The State Department's January 2026 zero-tolerance enforcement on AI alterations applies to facial changes. The boundary for background replacement is different and more nuanced.
What is permitted
Clean background replacement: removing a non-compliant background and replacing it with a plain white or off-white color, provided the replacement is seamless and does not alter the outline of the hair, face, or neck. PassportApp's background removal applies a plain white background within the accepted color range. This is accepted.
Basic cropping and resizing: adjusting the image to the correct 2x2 inch dimensions and head position. This is explicitly permitted.
What is not permitted
Using digital tools to remove a shadow from an otherwise non-compliant background and then claiming the photo is unedited. The State Department is explicit: *"A photo with a cluttered background should be changed by retaking the image, not digitally erased."* If the original background is not compliant, the solution is a new photo in front of a compliant background — not editing the existing photo.
Altering the outline of the hair, face, or neck during background removal. When AI segmentation tools separate the subject from the background, they sometimes produce a halo effect around flyaway hairs, visibly altering the hair outline. The State Department specifically lists *"background is cropped using a photo retouching tool, changing the outline of your head, face, and neck"* as a rejection cause.
The 100% zoom verification test
After any background replacement, zoom to 100% on the image and examine the edges where the hair meets the background. Look for: a visible lighter or darker halo around the hair outline, unnatural sharp edges on hair that should be soft, missing hair strands that were removed with the background, and any color fringing. These artifacts are invisible at thumbnail viewing distance but visible to the automated checker and to human examiners.
[WARNING]Do not use AI background replacement on photos with very dark hair against a dark background, curly or textured hair with many small flyaways, or photos where the original background colour was close to the hair colour. These combinations produce the highest rate of visible artifacts and are most likely to trigger rejection.[/WARNING]
Ready to create your passport photo?
Get a compliant passport photo in minutes. AI-verified. 100% acceptance guarantee or your money back.
Why Choose PassportApp?
Ready in 2 Minutes
AI processing delivers your compliant photo instantly — no booth queues.
Money Back Guarantee
Full refund if your application is rejected due to the photo.
Compliance Verified
Every photo is checked against official requirements before download.
Frequently Asked Questions
Plain white or off-white. The State Department primary source states: 'Use a plain white or off-white background free of shadows, textures, or objects.' Off-white is explicitly permitted. Light cream and very pale eggshell are generally accepted. Medium cream, beige, grey, light blue, and any other color are rejected. The safe hex code range is #ffffff to approximately #f0f0f0.
Three causes. First: shadow from standing too close to the wall — position yourself at least three feet away so your shadow falls below the frame. Second: face overexposure causes the camera to underexpose the background, making it appear darker — use even, diffused light. Third: your wall is off-white (cream, eggshell) which photographs as grey in many lighting conditions — use the bathroom, white poster board, or an ironed white sheet instead.
Yes, with conditions. Clean background replacement (removing a non-compliant background and replacing it with plain white) is accepted when seamless. What is not accepted: removing a shadow from a non-compliant background to claim the photo is unedited, or any replacement that changes the outline of the hair, face, or neck. Verify at 100% zoom that no halo or artifact appears at the hair edges after replacement.
Not recommended. Textured walls (orange peel, knockdown, popcorn) cast micro-shadows that appear as grey or uneven backgrounds in photographs even when the wall looks white to the eye. Use a smooth flat wall, white poster board, or an ironed white sheet.
Yes. White or very light clothing against a white background creates an indistinct silhouette where the automated checker struggles to find the applicant's outline. Wear a color with clear contrast against white: navy, dark blue, burgundy, dark green, or any medium-to-dark color.
No. Camera flash creates a hard shadow directly behind your head on the wall, even at a distance of three feet. This shadow causes background rejection. Use natural window light from in front of you instead. Overcast days produce the most even light.
Off-white is the accepted category, and very light cream falls within it. The practical boundary is whether the background photographs within the #ffffff to approximately #f0f0f0 range. A wall described as 'antique white' or 'warm white' may be acceptable or borderline depending on lighting. If uncertain, use a piece of white printer paper as a reference: if the wall looks noticeably more yellow or grey next to the paper, it is outside the safe range.
Almost certainly yes if the door or window is visible in the frame. Any object visible in the background causes rejection — including door frames, window frames, furniture, wall art, houseplants, and architectural features. Even a doorframe at the edge of the frame can flag the photo. Ensure the background visible in the frame contains only the plain white or off-white wall surface.
Related Tools